A Comprehensive Guide to Maintaining and Sharpening Your Garden Pruners
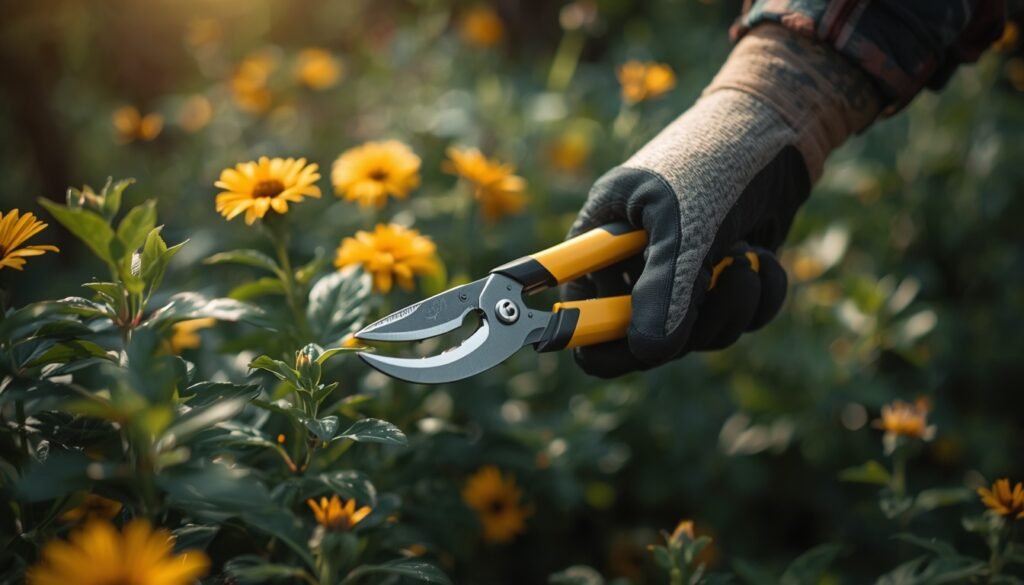
In the world of horticulture, a pair of high-quality pruners (or secateurs) is often a gardener’s most prized possession. They are the surgical instruments of the landscape, responsible for everything from deadheading delicate perennials to structural pruning of woody shrubs. However, even the most expensive carbon-steel pruners will underperform if neglected.
A dull or dirty blade doesn’t just make your work harder; it actively harms your plants. Jagged, crushed cuts take longer to heal, creating an open invitation for pests and fungal pathogens. To ensure your tools—and your garden—remain in peak condition, follow this comprehensive guide to professional-grade maintenance and sharpening.
The Importance of Cleanliness: More Than Aesthetics
Before you can sharpen a blade, you must clean it. Throughout a growing season, pruners accumulate a “biofilm” of sap, resin, and soil. This sticky residue increases friction during the cut and can harbor diseases like fire blight or verticillium wilt, which are easily transferred from a sick plant to a healthy one.
The Cleaning Process
-
Scrubbing: Use a stiff-bristled brush or a scouring pad with warm, soapy water to remove surface dirt.
-
Solvent Treatment: For stubborn sap or resin, apply a small amount of rubbing alcohol or a specialized citrus-based cleaner. These solvents break down the organic bonds of the sap without damaging the metal.
-
Disinfection: If you have been pruning diseased wood, dip the blades in a solution of 70% isopropyl alcohol. Unlike bleach, alcohol is effective at killing pathogens without being corrosive to the steel.
The Art of Sharpening: Restoring the Edge
Most garden pruners fall into two categories: bypass and anvil. This guide focuses on bypass pruners—the most common type—where a sharp blade “bypasses” a thicker base (the hook).
Tools You Will Need
-
A Diamond File or Whetting Stone: For gardening tools, a medium-to-fine grit (around 400–600 grit) is ideal.
-
Lubricating Oil: This prevents metal shavings from clogging the stone and protects the blade.
-
Safety Gloves: To protect your fingers during the sharpening stroke.
Step-by-Step Sharpening Technique
-
Identify the Bevel: Look closely at the cutting blade. You will notice a slanted edge (the bevel) on one side, while the back of the blade is flat. You only ever sharpen the beveled side.
-
Match the Angle: Hold your file at the same angle as the existing factory bevel—usually between $20^{\circ}$ and $25^{\circ}$. Maintaining this consistency is the secret to a sharp, durable edge.
-
The Stroke: Move the file in a smooth, curved motion from the base (the “throat”) of the blade toward the tip. Always stroke away from your body. Lift the file at the end of the stroke and repeat. Avoid a back-and-forth “sawing” motion, as this can create an uneven edge.
-
Remove the Burr: After 10 to 15 strokes, turn the pruners over. You will feel a slight “burr” or metal lip on the flat side of the blade. Lay your file perfectly flat against the back and give it one or two light strokes to whisk away the burr.
Lubrication and Reassembly
Once the blade is sharp and clean, you must address the mechanical health of the tool. Pruners rely on a central pivot bolt and a spring to function smoothly.
-
Oil the Pivot: Apply a drop of multi-purpose machine oil or a specialized tool lubricant to the central bolt. Open and close the pruners several times to work the oil into the joint.
-
Protect the Blade: Wipe the entire metal surface with an oily rag. This creates a hydrophobic barrier that prevents oxygen and moisture from reaching the steel, effectively stopping rust before it starts.
-
Adjust the Tension: If your pruners are “chewing” the wood rather than cutting it, the pivot bolt may be loose. Tighten it just enough so that the blades pass each other without a gap, but not so tight that they stick.
Professional Storage Habits
Proper maintenance is most effective when paired with good storage habits. Never leave your pruners in the garden overnight, as the morning dew is a primary catalyst for oxidation. Store your tools in a dry environment, ideally hanging on a pegboard or kept in a tool roll.
For winter storage, some professional gardeners recommend keeping a bucket of sand mixed with a small amount of motor oil in the shed. Plunging the clean metal heads into the oily sand cleans the surface and provides a heavy protective coating for the off-season.
Conclusion: A Cut Above
Maintaining your garden pruners is a meditative ritual that pays dividends in the garden. A well-sharpened tool transforms a chore into a pleasure, requiring less physical effort and leaving your plants with the clean, surgical wounds they need to thrive.
By dedicating just fifteen minutes a month to cleaning, sharpening, and lubricating your gear, you extend the life of your tools by decades. In a world of disposable products, a well-maintained pair of pruners stands as a testament to the value of quality craftsmanship and responsible stewardship.