Drip Irrigation Kits: A Step-by-Step Guide for Vegetable Patches
The dream of a bountiful vegetable harvest often meets the harsh reality of summer heat and inconsistent watering. For many gardeners, the traditional method of overhead watering with a spray nozzle is not only time-consuming but also inefficient, with much of the water evaporating before it ever reaches the roots.
Drip irrigation kits represent the gold standard in modern gardening. By delivering water slowly and directly to the base of each plant, these systems maximize efficiency, reduce the risk of foliage diseases, and ensure your vegetable patch thrives even in the warmest climates. This professional guide will walk you through the process of selecting and installing a drip irrigation system for your home garden.
Why Choose Drip Irrigation?
Standard watering methods often lead to “water stress”—the cycle of the soil becoming completely saturated followed by a period of total dehydration. Drip irrigation eliminates this cycle by maintaining consistent moisture levels.
-
Water Conservation: Drip systems can be up to 90% efficient, significantly reducing runoff and evaporation compared to sprinklers.
-
Disease Prevention: Many vegetable diseases, such as powdery mildew, thrive when leaves are constantly wet. Drip kits keep the foliage dry by targeting only the soil.
-
Automated Precision: When paired with a smart controller, your garden can be watered with surgical precision based on real-time weather data.
Step 1: Planning Your Layout
Before purchasing a kit, sketch your vegetable patch. Measure the length of your rows and the spacing between plants. Most starter kits are designed for specific areas (e.g., 100 square feet).
Identify your water source. If your garden is far from a hose bib, you may need a “mainline” of 1/2-inch poly tubing to bridge the gap before branching off into the smaller 1/4-inch “spaghetti” lines that feed the individual emitters.
Step 2: The Components of a Professional Kit
A high-quality drip irrigation kit typically includes:
-
Backflow Preventer: Prevents garden water from being sucked back into your home’s clean water supply.
-
Pressure Regulator: Most home water pressure is too high for delicate drip lines. This device drops the pressure to a manageable 25 PSI.
-
Filter: Even small particles in tap water can clog tiny emitters. A mesh filter is essential for system longevity.
-
Mainline Tubing: The “backbone” of the system.
-
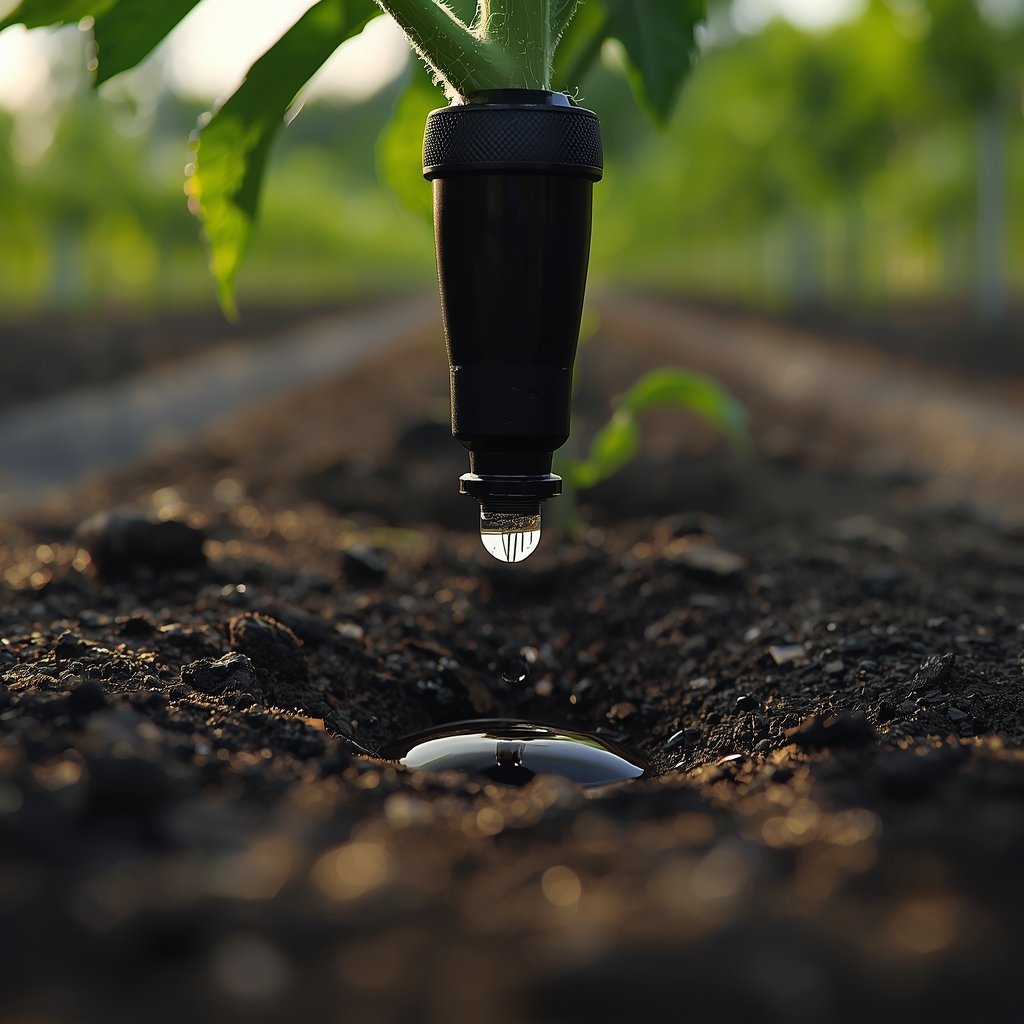
Emitters/Drippers: These come in different flow rates (e.g., 0.5 to 2.0 gallons per hour). Choose higher rates for thirsty plants like tomatoes and lower rates for herbs.
Step 3: Installation Process
Connection to Source
Attach the backflow preventer, pressure regulator, and filter to your outdoor faucet. If you are using an automated timer, it should be the first component attached to the tap.
Laying the Mainline
Run your 1/2-inch poly tubing along the edge of your vegetable beds. Secure it with landscape staples to prevent it from shifting. In warmer regions like Jelutong, Penang, it is often helpful to let the tubing sit in the sun for 20 minutes before installation to make it more pliable.
Installing the Emitters
Using a dedicated punch tool, create holes in the mainline where you need to branch off to a plant. Insert a connector and attach a length of 1/4-inch tubing. Place the emitter at the end of this line, positioned directly at the base of the plant.
Flushing the System
Before sealing the ends of your tubing with “end caps,” turn the water on for a minute. This flushes out any dirt or plastic shavings that entered the lines during installation. Once clear, cap the lines and check for leaks.
Step 4: Maintenance and Optimization
To keep your system in top shape:
-
Check Emitters Monthly: Ensure they aren’t clogged by mineral deposits or buried under mulch.
-
Seasonal Adjustments: As your vegetables grow and the weather changes, adjust the frequency and duration of your watering cycles.
-
Winterization: In colder climates, drain the lines before the first frost to prevent the plastic from cracking.
Conclusion
Investing the time to install a drip irrigation kit is one of the most effective ways to upgrade your garden. It shifts the focus from the chore of watering to the joy of cultivation. By delivering water exactly where it is needed, you are not just growing vegetables; you are building a more sustainable and resilient landscape.